ASP.NET Core APIs: Getting Swashbuckle to work with Auth0
Overview
Background
Using JWT bearer token authentication for your ASP.NET Core API projects is pretty standard stuff these days, and I've
done it many times - mostly with tokens from Duende IdentityServer.
When I tried to update the code and configuration to use Auth0 though, I kept getting a 401 response
after authenticating properly, with a message about an invalid_token
and the token itself was a JWT but it had an empty payload -- the part of the JWT that contains the claims.
tl;dr
I'll explain the full setup below, but make sure you send the audience query string parameter with your OAuth2
authentication request to the authorize endpoint (as shown in the OAuthAdditionalQueryStringParams method
below). A code repo that demonstrates this is here: https://github.com/dahlsailrunner/auth0-swashbuckle-api (but you need to provide your own Auth0 tenant and client id).
 1app.UseSwagger()
 2   .UseSwaggerUI(options =>
 3    {
 4        options.OAuthClientId(clientId);
 5        options.OAuthAppName("QuickDemo");
 6        options.OAuthUsePkce();
 7        options.OAuthAdditionalQueryStringParams(new Dictionary<string, string>
 8        {
 9            { "audience", "https://yourapi-identifier-in-auth0" }
10        });
11    });
Setting Up an ASP.NET Core API for JWT Bearer Authentication
If you've created a new web api, setting it up to support bearer token authentication is pretty simple.
You need to add a NuGet package reference for Microsoft.AspNetCore.Authentication.JwtBearer as a first step.
Then in Program.cs add code that looks like the following:
1builder.Services
2  .AddAuthentication("Bearer")
3  .AddJwtBearer(options =>
4  {
5      options.Authority = "YOUR-AUTH0-TENANT";
6      options.Audience = "PLACEHOLDER FOR API IDENTIFIER";
7  });
You should probably also have the following in your Program.cs file a little further down for the HTTP
request pipeline which will require an authenticated user on calls to your API:
1 app
2  .UseAuthentication()
3  .UseRouting()
4  .UseAuthorization()
5  .UseEndpoints(endpoints =>
6  {
7      endpoints.MapControllers().RequireAuthorization();
8  });
Configuring the API within Auth0
Within the management area of Auth0, there is an Applications section, and that has an item called APIs.
If you go there and Create API you will be presented with a dialog that looks something like this:
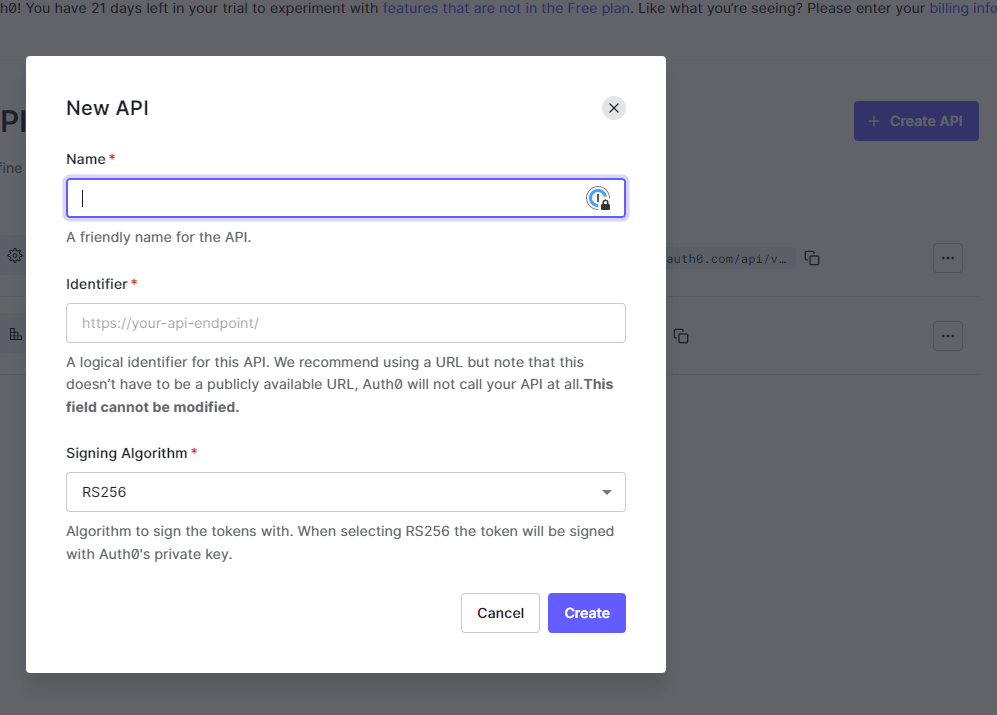
In the Identifier section you can specify anything you like, but the value here will need to be
what you provide in the audience querystring parameter.
Once you have done this, make sure to update the Authority and Audience values of the AddJwtBearer call
above.
Testing the authentication to your API
If you have created an API within Auth0 and updated the Authority and Audience values in your code/configuration,
you can test the authorization in your API.
Make a simple GET request to your API and it should return a 401 since you are not passing a JWT bearer token
in the HTTP headers yet.
Then go to the Test page in the Auth0 API settings for your API as shown below:
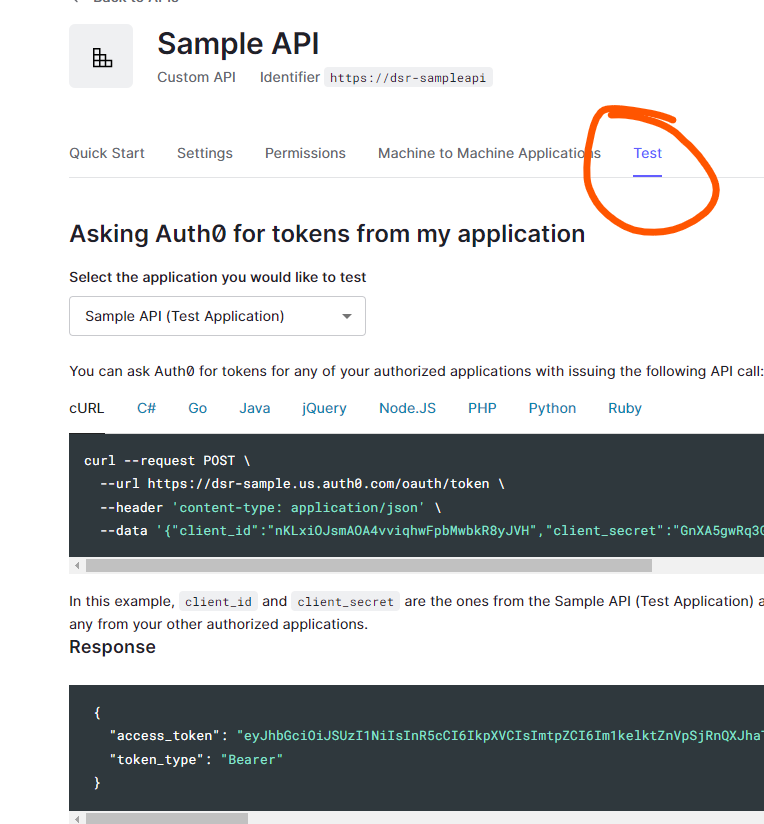
The Response section will show an access_token that you can use.
Using a tool like [Postman] or [Insomnia] or anything else, send the same GET request to your
API method but this time add an HTTP header called Authorization and set the value to Bearer ACCESS_TOKEN_VALUE
where you replace ACCESS_TOKEN_VALUE with the access_token from the test page. In the screen shot this
would be eyJh... (rest of token omitted).
This should return a successful response from your API, which means it is properly requiring authenticated users.
Configuring a Swagger Client Application in Auth0
If you want to test your API from the Swagger UI, you need to set up an Application within Auth0 to do that.
You should set up a Single Page Application for this. In the Applications section of Auth0 choose "Create Application" and choose the "Single Page Web Applications" option.
The Settings page should look something like this:
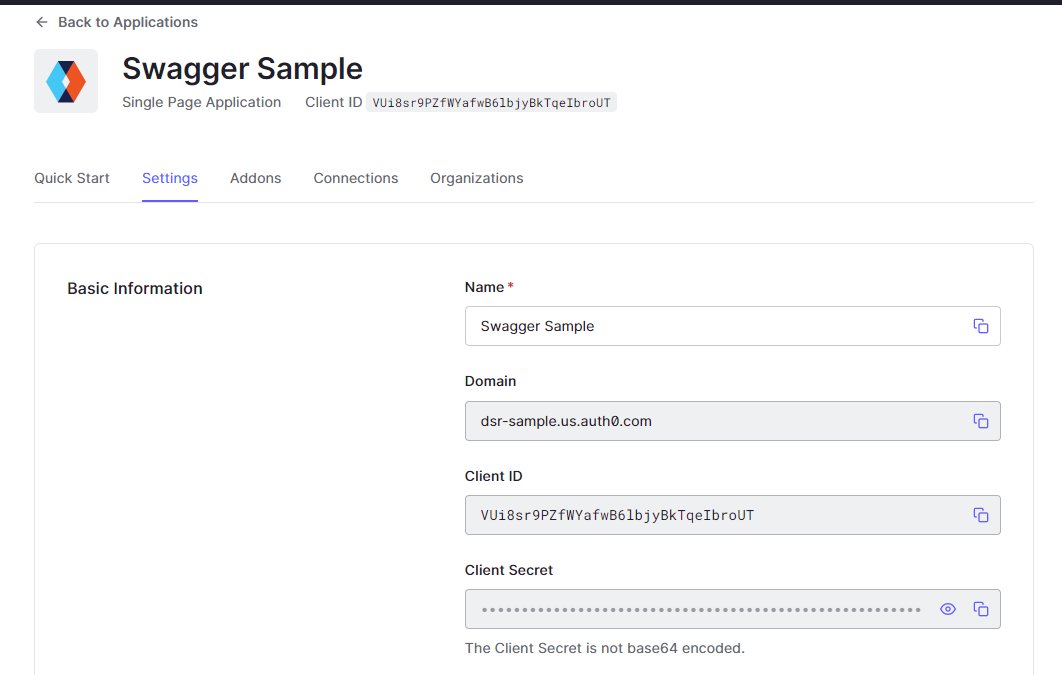
Note the Domain - this will be the Authority - it should be the same value you used for the
AddJwtBearer authority above.
Also note the Client ID - this will be the OAuth2 Client Id that you will need to provide
to some Swagger setup below.
In the Application URIs section, provide the Callback URL for your API. It will be the base address
of your API with /oauth2-redirect.html appended, so something like this:
1 https://localhost:44380/oauth2-redirect.html
Connecting Swagger UI Authentication to Auth0
Using the Swagger UI to test your API is very handy, and relatively easy to set up.
You may want your Swagger UI (and even the Swagger doc itself) available in non-production
environments. If this is the case just make sure to wrap your UseSwagger method calls with
an environment check.
For my purposes, I find that having the code related to Swagger in its own folder can be
helpful, and I've created two extension methods (AddSwaggerFeatures and UseSwaggerFeatures)
that I call from Program.cs - and they are shown in the listing below (which you can expand with
the ellipsis "...") - note that they support both authentication and versioned APIs:
 1public static class SwaggerExtensions
 2{
 3  public static IServiceCollection AddSwaggerFeatures(this IServiceCollection services)
 4  {
 5      services.AddTransient<IConfigureOptions<SwaggerGenOptions>, ConfigureSwaggerOptions>();
 6      services.AddSwaggerGen();
 7
 8      return services;
 9  }
10
11  public static IApplicationBuilder UseSwaggerFeatures(this IApplicationBuilder app, IConfiguration config,
12      IApiVersionDescriptionProvider provider, IWebHostEnvironment env)
13  {
14    if (!env.IsDevelopment())
15    {
16        return app;
17    }
18
19    var clientId = config.GetValue<string>("Authentication:SwaggerClientId");
20    app
21      .UseSwagger()
22      .UseSwaggerUI(options =>
23      {
24        foreach (var description in provider.ApiVersionDescriptions)
25        {
26          options.SwaggerEndpoint($"/swagger/{description.GroupName}/swagger.json",
27              $"QuickDemo API {description.GroupName.ToUpperInvariant()}");
28          options.RoutePrefix = string.Empty;
29        }
30
31        options.DocumentTitle = "QuickDemo Documentation";
32        options.OAuthClientId(clientId);
33        options.OAuthAppName("QuickDemo");
34        options.OAuthUsePkce();
35        options.OAuthAdditionalQueryStringParams(new Dictionary<string, string>
36        {
37          { "audience", config.GetValue<string>("Authentication:ApiName") }
38        });
39      });
40
41    return app;
42  }
43}
A key ingredient of the above code (you need to expand the listing to see it) is the inclusion
of the audience query string parameter when making the authorize request to Auth0. It's these
three lines:
1options.OAuthAdditionalQueryStringParams(new Dictionary<string, string>
2{
3  { "audience", config.GetValue<string>("Authentication:ApiName") }
4});
The ConfigureSwaggerOptions class is a second file that I generally use and it has the
security definitions that will be used - and it reads configuration to drive it. The
listing is probably easier to see on GitHub.
The configuration that both of the Swagger-related files read is here:
1 "Authentication": {
2    "Authority": "YOUR_AUTH0_TENANT - https://tenant.us.auth0.com",
3    "ApiName": "https://dsr-sampleapi",
4    "SwaggerClientId": "AUTH0_SINGLE_PAGE_CLIENTID",
5    "AdditionalScopes": "openid profile email read:everything"
6  }
Once you've got some code at least somewhat like this, you should be able to run your API and see
a Swagger UI that includes an Authorize button, and when you click it the dialog you see
should look something like this:
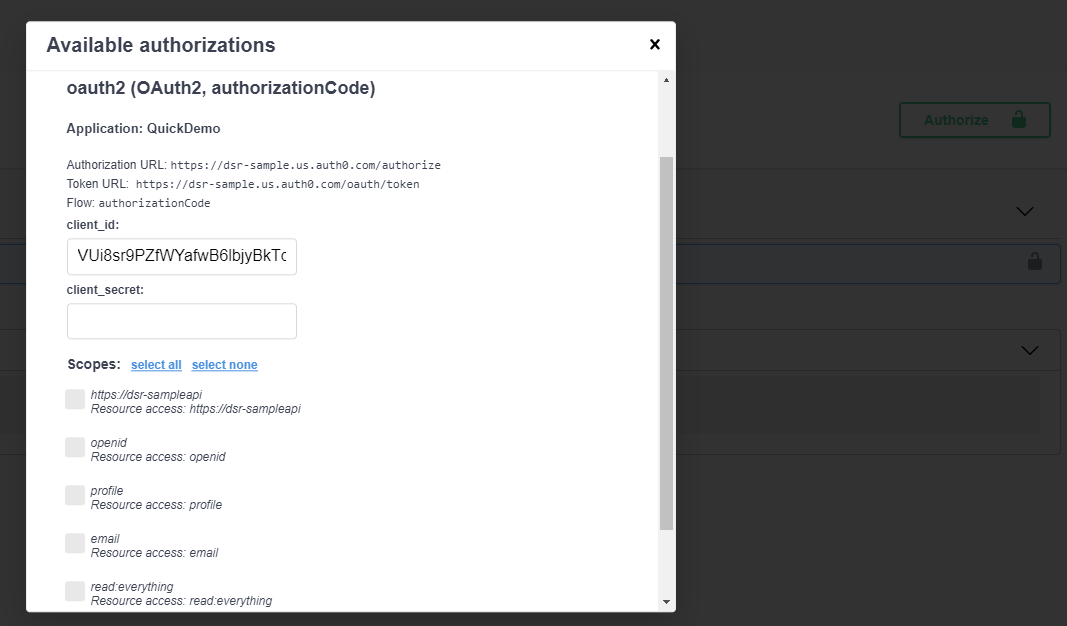
The client_secret can be left blank as it is not used in this particular
authorization flow (Code with PKCE). You should choose select all to choose all of the
scopes.
Once you complete the authorization, you should be back on the Swagger page and you
can execute API methods. When you do that, you should see a curl command that includes
the bearer token that was issued when you logged in:
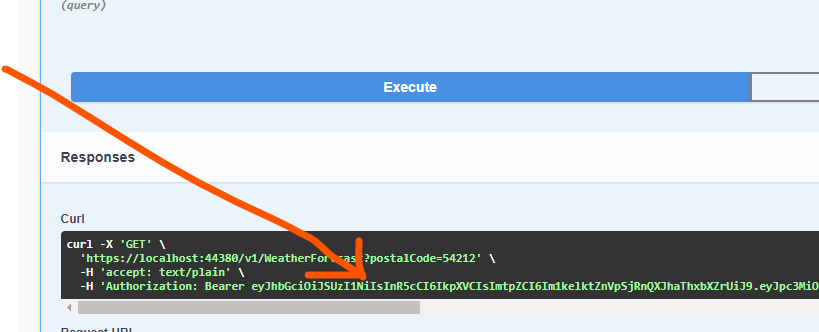
You can copy that bearer token value - the whole thing, it's long - into your clipboard and paste the value into JWT.io
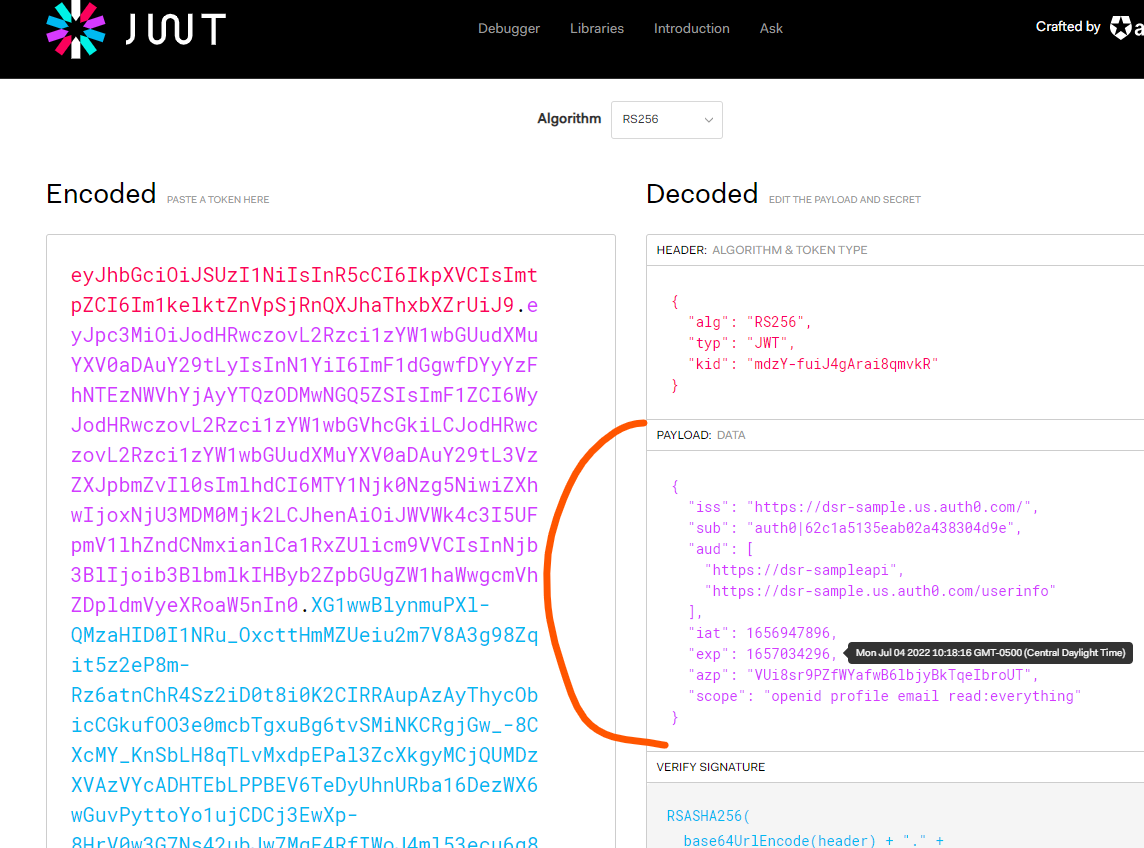
Your API call should have been successful, and if you put a breakpoint in the controller
and look at the User property, you should see claims that match the payload section shown
above.
Awesome!
Going Further
There is an additional scope in the token that I was showing above called read:everything and
this was something I configured both in the API defined in Auth0 as a "permission" that can
be associated with it, and in the requested scope from the application. You could wire up
some permissions in the ASP.NET Core API to make sure that this scope is allowed on the GET
methods of your API.
Hope this was helpful!