Upping Your Audio Game
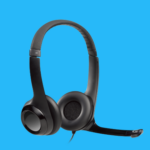
I’m a coder / architect. In other words, NOT an audio guy. A couple of years ago I started creating video training courses for Pluralsight, and the video and recording/editing aspects of doing this were definitely the most challenging things for me. Recording and editing is just something that takes practice, but I knew my audio setup was a little sub-par. I was rockin’ a simple little Logitech USB headset/mic combo (pictured below) and was ready for an upgrade – both to improve my audio quality for courses and for online calls as well.
What to Buy?
I knew I wanted an improved setup – and with so many options out there, what should I buy? In this case working with Pluralsight was actually a really big help – because they have editors on staff that ARE audio folks. To my very pleasant surprise, just when I was looking to up my game, they were working on some good-, better-, best-flavored "kit" recommendations for people in exactly my situation. Pure awesomeness! The only thing left was making sure I didn’t break the bank – the recommendation I got was for the "better" flavor.
The "Better" Kit
The kit that I ended up getting has four components:
- Condenser microphone set with pop filter and shock mount (~$200)
- Boom arm (~$15)
- USB audio interface ($100)
- Shorter microphone cable (~$10)
The only reason for the shorter mic cable is that the one that the mic comes with is 20 feet long! Since it’s only hooked to a computer desk, a 6 foot cable is just fine and eliminates some extra headache.
The Setup
Setting everything up was surprisingly easy.
I started with the boom arm, which contains a little clamp on the end that I just clamped straight onto my desk.
The I connected the shock mount from the mic kit to the end of the boom arm. There’s a wing-nut type screw tightener to make sure things stay in place.
Then I put the mic in the shock mount – just screwing it in place. The thing to note here is that the little gold "dot" needs to be facing you.
Then I put the pop filter on the front side of the shock mount.
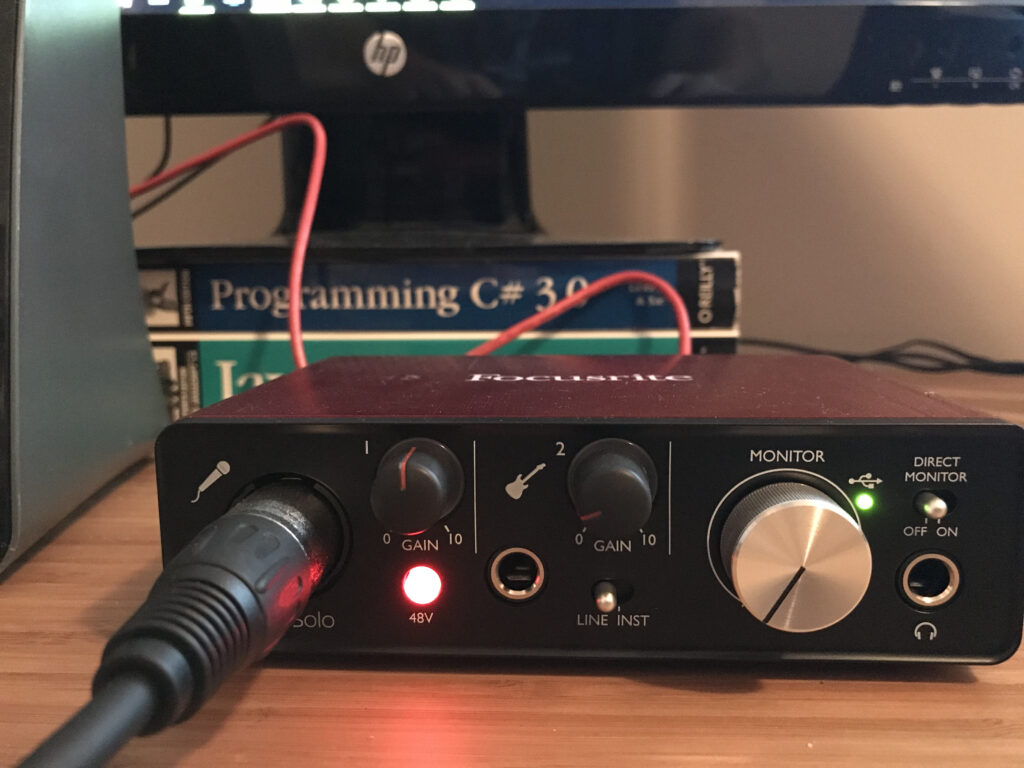
Before I connected the USB interface to the computer, I downloaded the software for the Focusrite from www.focusrite.com/downloads. The instructions for this were under the boxtop containing the device itself. Open it, and you’ll see them (the instructions seem to indicate that no download is required for Macs).
The last thing to do was to put the Focusrite (USB audio interface) device on my desk and connect the red USB cable to my computer (a Surface Dock in my case) and then connect the shorter microphone cable from the Focusrite mic input to the bottom of the microphone.
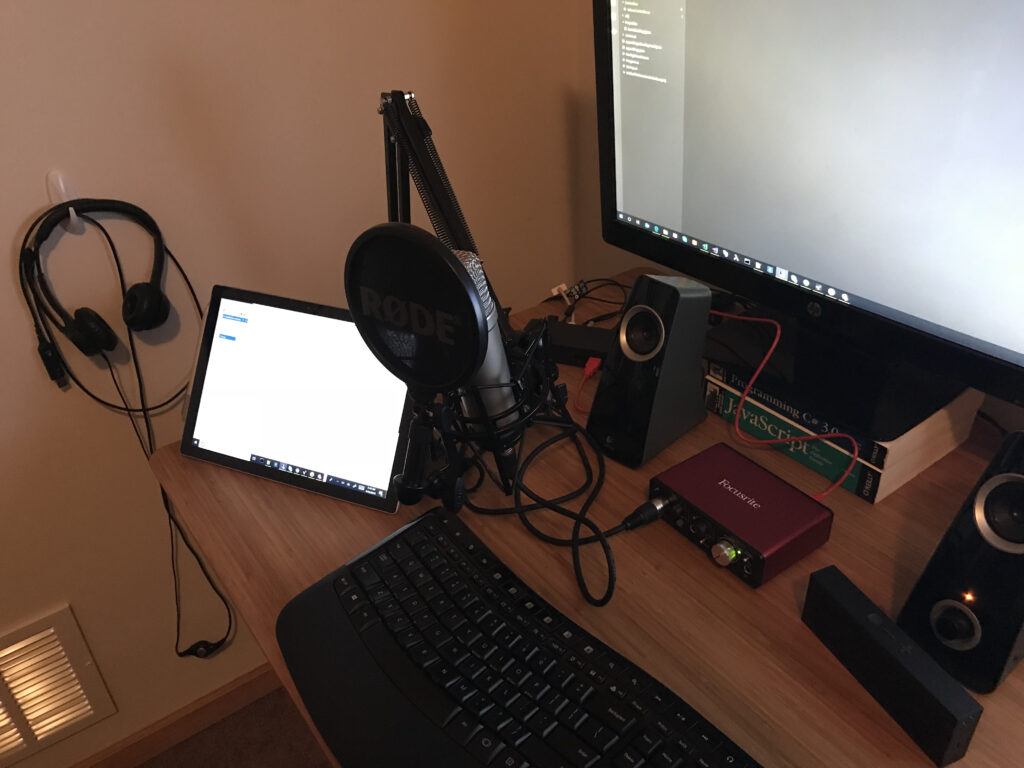
Completed setup shown below (along with the OLD headset on the wall 😊).
Testing it out
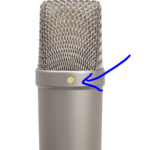
As soon as you plug in the USB audio device, you will see a little green light on the Focusrite device light up. This doesn’t mean your mic is on, though.
There is a power button by the audio cable you need to push, and then also turn up the dial above it to at somewhere around the halfway
point (your mileage may vary on the dial) – as shown in the following picture.
Once you’ve done that you need to make sure the audio device is set up properly on your computer. Just make sure that the selected audio input is the Focusrite USB device.
Then make a call (Teams, Skype, Slack, Zoom, etc) or do a recording!
You’ll notice that I have speakers RIGHT BEHIND the mic on my desk. I didn’t have a real problem on the calls that I made even though the audio was coming out of those. For recording, though, your speakers probably won’t even come into play.
Enjoy the better audio – or better yet the people that you’re communicating with will now enjoy your better audio! 🙂