Secure Web APIs With Swagger, Swashbuckle, and OAuth2 (Part 4)
This article continues the process started in part 1 which concluded with us having an API that has both anonymous and secure methods that can be called, and a Swagger interface provided by Swashbuckle. For this post, I will be discussing how to secure the Swagger interface so that public / anonymous users cannot browse your API.
I’ll break the topic into two logical parts: disabling anonymous access, and then enabling authenticated access.
Disabling anonymous access
As it turns out, this is pretty easy but a little more roundabout than you might think. In order to get started, I added a global authorization filter, and then made the HomeController accept anonymous requests.
Adding a global authorization filter
If you modify the FilterConfig.cs in App_Start with the line that follows, you will essentially require authorization for every routed request in your application.
1filters.Add(new AuthorizeAttribute());
Enabling anonymous access to the HomeController actions
In order to allow anonymous users (including those that simply want to be able to login to your site) to see the content provided by the home
controller — like a welcome page with a login form on it – you would add the AllowAnonymous attribute to your controller class as shown below.
1[AllowAnonymous]
2public class HomeController : Controller
3{
4    //.....
5}
You mean we’re not done yet?
When I first started attempting to lock down the Swagger UI, I kinda figured I would be about done at this point — the global authorization filter should require authentication on every request except my explicitly-allowed HomeController – right? Wrong. For some reason (I suspect the route for Swagger is added later and the global filter never found its way to the new route), you can still get to “/swagger/ui/index” even with the configuration we now have in place, so more work was needed.
Answer: Add a swagger directory and its own web.config file
Gabriel-a had a fairly elegant solution for this that I discovered in the GitHub issue set for Swashbuckle: https://github.com/domaindrivendev/Swashbuckle/issues/384 If you add a new folder to your api project called “swagger” and then put a new web.config file in the folder with the contents below, we have achieved the desired result:
 1<configuration>
 2  <system.web>
 3   <authorization>
 4     <deny users="?" />
 5   </authorization>
 6  </system.web>
 7  <system.webServer>
 8     <modules runAllManagedModulesForAllRequests="true" />
 9  </system.webServer>
10 </configuration>
At this point, no anonymous users can access the swagger/ui/index URL to browse the API. In fact, NO ONE can, because we haven’t enabled any kind of login functionality yet — that comes next. But before that, I wanted to point out one more thing.
Disabling the Swagger validation
You may have been noticing a little “Error” validation piece at the bottom of your Swagger page — as shown in the picture below.
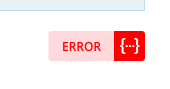
This image/tag appears due to validation that is pre-configured to happen that ensures you have a valid Swagger document. By default, this is “on” and the validator is the swagger webserver itself. Assuming you have a valid Swagger document, the main reason you would see an error is because the Swagger website cannot see the Swagger doc provided by your URL. And this can be because you’re running locally on some “localhost” type address that is not publicly accessible, OR because your swagger documents have been locked down (by the changes we just made).
You can either provide your own validator (I chose not to go this route), or disable the validation. To disable the validation, you
might be able to add/uncomment the following line of SwaggerConfig.cs within the .EnableSwaggerUi method:
1c.DisableValidator();
But if you have introduced your own custom HTML (as I did in the previous post),
you will need to modify the custom HTML javascript with the validatorUrl line below (note the “null”):
 1window.swashbuckleConfig = {
 2     rootUrl: '%(RootUrl)',
 3     discoveryPaths: arrayFrom('%(DiscoveryPaths)'),
 4     booleanValue: arrayFrom('true|false'),
 5     validatorUrl: stringOrNullFrom('null'),
 6     customScripts: arrayFrom(''),
 7     docExpansion: '%(DocExpansion)',
 8     oAuth2Enabled: '%(OAuth2Enabled)',
 9     oAuth2ClientId: '%(OAuth2ClientId)',
10     oAuth2Realm: '%(OAuth2Realm)',
11     oAuth2AppName: '%(OAuth2AppName)'
12 };
Onto enabling login!!
Enabling authenticated access
This segment will involve adding login functionality to the “browse-able” site — which will be cookie-based, rather than the token-based authentication used by the actual API we are providing.
Enabling Cookie Authentication
First we should tell our site that it can accept cookie-based authentication if it is present. We do that by adding to the ConfigAuth method
we created in part 1.
 1public void ConfigureAuth(IAppBuilder app)
 2{
 3    app.UseIdentityServerBearerTokenAuthentication(new IdentityServerBearerTokenAuthenticationOptions
 4    {
 5        Authority = SomeStaticHelperClass.GetIssuerUri(),
 6        RequiredScopes = new[] { "sampleapi" }
 7    });
 8
 9    app.UseCookieAuthentication(new CookieAuthenticationOptions
10    {
11        AuthenticationType = "Cookies"
12    });
13}
Next we need to figure out how we want our users to be able to log in.
Endgame to support login — fundamentals
In order to support cookie-based login, you need to have some code somewhere that does the following:
1var id = new ClaimsIdentity(claims, "Cookies");
2Request.GetOwinContext().Authentication.SignIn(id);
If you come up with a list of claims that you want based on some form input or anything else going on in your app, just
create a new ClaimsIdentity with an authenticationType of “Cookies” and sign that id in to the OwinContext. What follows below is more
specific to my own login process / business requirements and how I am using IdentityServer3.
My login options leveraging IdentityServer3
In my project, I wanted to meet a few requirements. I wanted users to be able to log in right from the home page (with a username/password form and a login button), and ALSO be able to support external authentication through Azure ActiveDirectory. As you may recall from part 1 (I encourage you to read it if you haven’t already), I have set up Thinktecture’s IdentityServer3 to use with my site. I have also added Azure to the identity server as a valid external authentication provider for this particular client (API and its browser interface). Doing that configuration is beyond the scope of this article (but I may write about that in another post); for this article, I want to focus on the client code to enable the login flows I mentioned, assuming that I already have a login provider that has been configured for me to use.
Putting the login options on the home page
I could have opted to use the login screens within IdentityServer3, but I chose to use my own so that the identity functionality was much more transparent to the users.
To add the login form to the home page of the site, I added a model class called LoginModel to the Models folder as follows:
1public class LoginModel
2{
3    public string UserName { get; set; }
4    public string Password { get; set; }
5}
Then I modified the controller code to use the model as shown here:
1public ActionResult Index()
2{
3    ViewBag.Title = "Home Page";
4    var model = new LoginModel();
5
6    return View(model);
7}
Then I modified the view to present the form and buttons necessary (it doesn’t really matter where you put your login form — just so that it’s somewhere on the page):
 1<div class="col-md-4">
 2    <h2>Start writing clients that can call the APIs</h2>
 3    <p>Log in and try them out.</p>
 4    <div id=" customLoginForm" class="input-group">
 5        <section id="loginForm">
 6            @using (Html.BeginForm(new { ViewBag.ReturnUrl }))
 7            {
 8                @Html.AntiForgeryToken()
 9                @Html.ValidationSummary(true)
10                <div class="focus">
11                        @Html.LabelFor(m => m.UserName)
12                        @Html.TextBoxFor(m => m.UserName, new Dictionary<string, object> { { "class", "nwpinput" } })<br />
13                        @Html.ValidationMessageFor(m => m.UserName)
14                </div>
15                <div>
16                        @Html.LabelFor(m => m.Password)
17                        @Html.PasswordFor(m => m.Password, new Dictionary<string, object> { { "class", "nwpinput" } })<br />
18                        @Html.ValidationMessageFor(m => m.Password)
19                </div>
20                <input class="btn btn-success" type="submit" value="Login"/>
21                <div>
22                    <input type="button" class="btn btn-success" value="Login with Organizational Account" onclick="location.href='/home/signinexternal'"/>
23                </div>
24            }
25        </section>
26        </div>
27    </div>
At this point you have a login form — when you submit the form using the “Login” button, it will “POST” to the Index controller
action with an input of the model. When you press the button “Login with Organizational Account” it will “GET” the SignInExternal
controller action. We’ll see where both of these take us below.
Using the local login form with the POST method
Essentially what is happening in this logic is that we want to take a username and password that the user have entered, turn those
into a ClaimsPrincipal with an authenticationType of “Cookies”, and then use that principal to sign in to the OwinContext, followed by
redirecting them to our swagger page. You could create your own claims principal if you wanted by validating the username and password
yourself, and then creating whatever claims you want.
In the code below, I am using a two-step process with the identity server — (1) use the resource owner “password” grant to validate the login attempt, and then (2) use the provided access token to call the userinfo endpoint to get a list of claims for the user. Once I have the claims, then I just create a ClaimsPrincipal and sign the user in to the OwinContext.
The resource owner password grant is no longer a recommended / supported flow for OIDC/OAuth2. It is preferable to log in on the IdentityServer itself, so any customization to create the user experience you want should be done on the IdentityServer login page rather than creating a page within a client application. The content below is simply preserved for posterity. :)
 1[HttpPost]
 2public async Task<ActionResult> Index(LoginModel model)
 3{
 4    if (!ModelState.IsValid)
 5        return View(model);
 6
 7    var claims = await GetIdentityTokenAsync(model);
 8
 9    if (claims != null && claims.Any())
10    {
11        if (claims.All(a => a.Type != ClaimTypes.NameIdentifier))
12            claims.Add(new Claim(ClaimTypes.NameIdentifier, claims.First(a => a.Type == "sub").Value));
13
14        if (claims.All(a => a.Type != "http://schemas.microsoft.com/accesscontrolservice/2010/07/claims/identityprovider"))
15            claims.Add(new Claim("http://schemas.microsoft.com/accesscontrolservice/2010/07/claims/identityprovider", "myidp"));
16
17        var id = new ClaimsIdentity(claims, "Cookies");
18        Request.GetOwinContext().Authentication.SignIn(id);
19
20        return Redirect("/swagger/ui/index");
21    }
22
23    ModelState.AddModelError("loginfail", "Invalid username or password.");
24    return View(model);
25}
26
27private async Task<List<Claim>> GetIdentityTokenAsync(LoginModel model)
28{
29    var baseUrl = SomeStaticHelperClass.GetIssuerUri();
30    var tokenEndpoint = baseUrl + "/connect/token";
31
32    var client = new OAuth2Client(
33        new Uri(tokenEndpoint),
34        "sampleapiapp",
35        "sampleapisecret");
36
37    var response = client.RequestResourceOwnerPasswordAsync(model.UserName, model.Password, scopesForAuth).Result;
38
39    if (string.IsNullOrEmpty(response.AccessToken))
40    {
41        return null;  // must have failed the login process
42    }
43
44    var userInfoEndpoint = baseUrl + "/connect/userinfo";
45
46    var userInfoClient = new UserInfoClient(
47                            new Uri(userInfoEndpoint),
48                            response.AccessToken);
49
50    var userInfo = await userInfoClient.GetAsync();
51
52    return userInfo.Claims.Select(claim => new Claim(claim.Item1, claim.Item2)).ToList();
53}
Using an external login service with a form post callback
For this flow, I am using the “Login with Organizational Account” button on the home page to indicate an Azure Active Directory login as provided for my identity server. The button should take the user straight to their Azure sign in location, and then back to the API site (after any permissions are granted / agreed to).
Here is the code I used for that — it starts with the GET for the SignInExternal method. Note that SignInExternal creates a callbackUrl
that is included with the CreateAuthorizeUrl method. The AuthorizeUrl that is created indicates that we should receive a POST to the callbackUrl
with the id_token if everything has been successful. Then it’s up to us (again) to turn that id_token into a ClaimsPrincipal and use it to
log in to the OwinContext with a “Cookies” authenticationType.
The id_token that we get back below is a Json Web Token (JWT), and turning one of those into a ClaimsIdentity involves calling
the JwtSecurityTokenHandler.ValidateToken method, which returns a ClaimsIdentity. But in order to even call that method, we need to
set the TokenValidationParameters. The ValidAudience and ValidIssuer parameters are easy enough, but the IssuerSigningToken bears some explanation.
This parameter needs to be the public portion of the certificate used to create the id_token — i.e. the certificate used by
my identity server in this case. The API is not the IdentityServer, so I had to write
the GetPublicCertificateForIssuer method to obtain that certificate. It works just fine and uses the
same “GetIssuerUri” method that has been used in a number of places in our code.
 1public ActionResult SignInExternal()
 2{
 3    var callbackUrl = string.Format("{0}://{1}/home/callback", Request.Url.Scheme, Request.Url.Authority);
 4    var state = Guid.NewGuid().ToString("N");
 5    var nonce = Guid.NewGuid().ToString("N");
 6
 7    var client = new OAuth2Client(new Uri(UserHelper.GetIssuerUri() + "/connect/authorize"));
 8    var url = client.CreateAuthorizeUrl("sampleapisso", "id_token token", scopesForAuth, callbackUrl, state, nonce, acrValues: "idp:AzureAD", responseMode: "form_post");
 9    return Redirect(url);
10}
11
12[HttpPost]
13public ActionResult Callback()
14{
15    var token = Request["id_token"];
16    var state = Request["state"];
17
18    var cert = GetPublicCertificateForIssuer();
19    var parameters = new TokenValidationParameters
20    {
21        ValidAudience = "sampleapisso",
22        ValidIssuer = UserHelper.GetIssuerUri().Replace("identity", ""),
23        IssuerSigningToken = new X509SecurityToken(cert)
24    };
25
26    var handler = new JwtSecurityTokenHandler();
27    SecurityToken jwt;
28    var claimsId = handler.ValidateToken(token, parameters, out jwt);
29    var claims = claimsId.Claims.ToList();
30
31    if (claims.All(a => a.Type != ClaimTypes.NameIdentifier))
32        claims.Add(new Claim(ClaimTypes.NameIdentifier, claims.First(a => a.Type == "sub").Value));
33
34    if (claims.All(a => a.Type != "http://schemas.microsoft.com/accesscontrolservice/2010/07/claims/identityprovider"))
35        claims.Add(new Claim("http://schemas.microsoft.com/accesscontrolservice/2010/07/claims/identityprovider", "myidp"));
36
37    var id = new ClaimsIdentity(claims, "Cookies");
38
39    Request.GetOwinContext().Authentication.SignIn(id);
40
41    return Redirect("/swagger/ui/index");
42}
43
44private static X509Certificate2 GetPublicCertificateForIssuer()
45{
46    var issuerUri = new Uri(SomeStaticHelperClass.GetIssuerUri());
47    var sp = ServicePointManager.FindServicePoint(issuerUri);
48
49    var groupName = Guid.NewGuid().ToString();
50    var req = WebRequest.Create(issuerUri) as HttpWebRequest;
51    req.ConnectionGroupName = groupName;
52
53    using (var resp = req.GetResponse())
54    {
55        /* empty body of using just to make sure webresponse is closed properly after getting response */
56    }
57    sp.CloseConnectionGroup(groupName);
58    var certBytes = sp.Certificate.Export(X509ContentType.Cert);
59
60    var cert = new X509Certificate2(certBytes);
61    return cert;
62}
Wrapping it all up
That’s it! You now have an API that supports token-based authentication for the API calls and a secure, custom Swagger interface that supports browsing and testing your API (using OAuth2 tokens) for authenticated users!!
Enjoy, and happy API-ing! 🙂